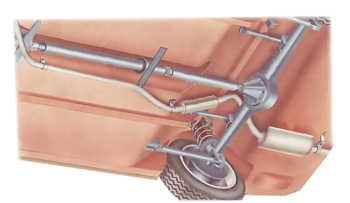
Vous pourriez avoir besoin de
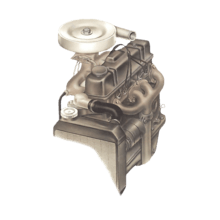
An exhaust-manifold gasket is more likely to need renewing than the gasket on the intake manifold, because of the greater damage caused to the exhaust system by heat; but the procedure is much the same for both.
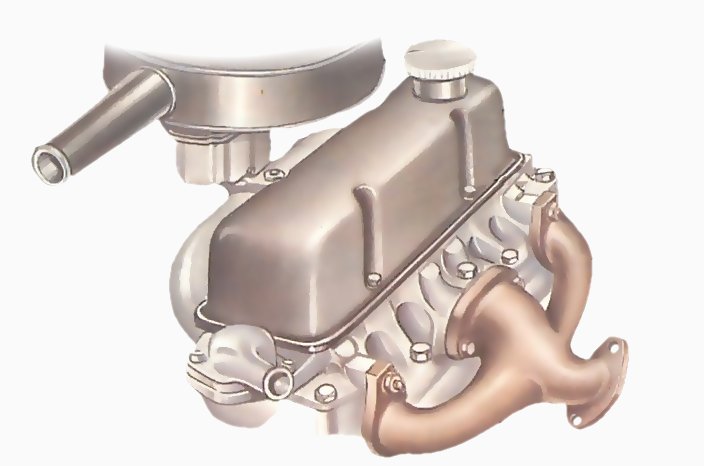
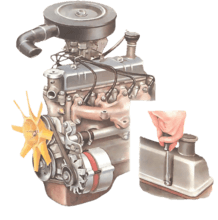
The inlet manifold may be on one side of the engine and the exhaust on the other, as shown here.
A 'blown' exhaust gasket can be detected by excessive noise from the exhaust, and by white burn marks around the manifold flange.
The intake and exhaust manifolds may be on opposite sides of the cylinder head, or they may be combined or bolted close together.
This video course is the best way to learn everything about cars.
Three hours of instruction available right now, and many more hours in production.
- 4K HD with full subtitles
- Complete disassembly of a sports car

If the engine has a V-configuration, there will be exhaust manifolds on the outer side of each cylinder bank, but probably just one intake manifold located in the centre of the V.
Apply penetrating oil to all nuts or bolts which have to be undone, including the exhaust-pipe clamp fixing.
When the nuts or bolts are removed, the remains of the old gasket may cause the manifold to stick: tap the manifold with a rawhide hammer to loosen it. If any manifold studs are broken or damaged, remove them using self-locking grips, two nuts and a spanner, or stud remover .
With the manifold off, carefully scrape all gasket-mounting surfaces clean of dirt and bits of the old gasket. Do not allow particles to fall into the manifold or the cylinder head.
Check the manifold to see that it is not cracked or damaged; check its face with a straight edge — such as a steel ruler — to see that it is not warped. If it is, replace it.
Fit a new gasket, making sure that it is the right way round, with all holes lined up. On some engines a gasket may be in two or three pieces, or inserts may be fitted; be sure all parts are properly aligned.
Some water-heated intake manifolds, particularly on V-engines, require gasket sealant on each side of the gasket, because the larger water passages are more prone to leakage.
Reassembly is in the reverse order of removal. Tighten the nuts on the manifold, using a torque wrench adjusted to the setting recommended in the car service manual. The tightening sequence is usually from the centre of the manifold outwards to the ends.
After reassembly, run the engine to working temperature, switch it off and check the torque settings.
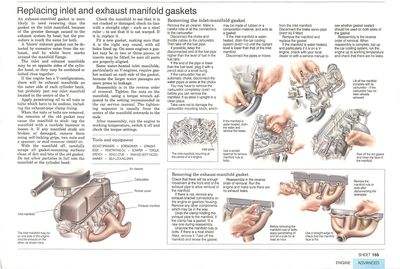
Removing the inlet-manifold gasket
Remove the air cleaner. Make a careful note of all the connections to the carburettor.
The inlet-manifold mounting at the centre of a V-engine.
Disconnect the choke and throttle cables to the carburettor. Then take off the fuel pipe.
If possible, keep the disconnected end of the fuel pipe higher than the level of fuel in the fuel tank.
If the manifold is water-heated, drain the water and remove the hoses.
If the end of the pipe is lower than the fuel level, plug it with a pencil stub or a small bung.
If the carburettor has an automatic choke, disconnect the water pipes or wires at the choke.
You may have to remove the carburettor completely (See Removing a carburettor for cleaning) before you can remove the manifold. If so store it upright in a clean place.
Take care not to damage the carburettor mounting block, which may be made of rubber or a composition material, and acts as a gasket.
If the intake manifold is water-heated, drain the car cooling system (See Checking and topping up car antifreeze coolant) until the coolant level is lower than that of the inlet manifold.
Use a socket spanner to remove manifold nuts or bolts.
Disconnect the pipes or hoses from the intake manifold. Disconnect the brake servo pipe if fitted.
Remove the manifold and replace the gasket.
If the manifold is water-heated, and particularly if it is on a V-engine, check with your local dealer or with a service manual to see whether gasket sealant should be used on both sides of the gasket.
Lift off the manifold complete with its carburettor - if the carburettor has not been already removed.
Peel off the old gasket and clean the face of the manifold.
Reassembly is the reverse order of removal. When reassembly is complete, top up the car cooling system, run the engine up to working temperature and check that there are no leaks.
Removing the exhaust-manifold gasket
Before removing the manifold nuts or bolts, apply penetrating oil and let it soak for at least an hour, and preferably overnight.
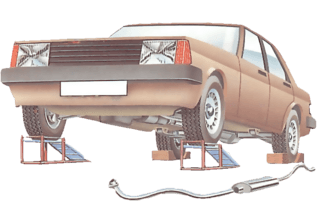
Check that there will be enough movement at the front end of the exhaust pipe to allow removal of the manifold.
If there is not, remove any exhaust-bracket connections on the engine or gearbox housing. Remove any other components which may be in the way.
Remove the manifold nuts or bolts after disconnecting the downpipe.
Undo the clamp holding the exhaust pipe to the manifold. If the clamp has a gasket, fit a new one during reassembly.
Unscrew the manifold nuts or bolts. If there is a heat shield fitted, remove it. Take off the manifold and renew the gasket.
Reassemble in the reverse order of removal. Run the engine and make sure there are no exhaust leaks.
