Vous pourriez avoir besoin de
- Vis large
- Brosse à fil
- Prises électriques
- Scie à métaux
- Clés
- Couteau
- Grattoir
- Lime mi-ronde
- Ciseau à froid
- Marteau
- Rampe
- Cable
- Support d'essieu
- Toile d'émeri
- Huile pénétrate
- Huile moteur
- Composé résistant au feu
- Composé de jointure
- Carnet
- Crayon de papier
- Torche
- Joints
- Lunettes de protection
- Fil de fer
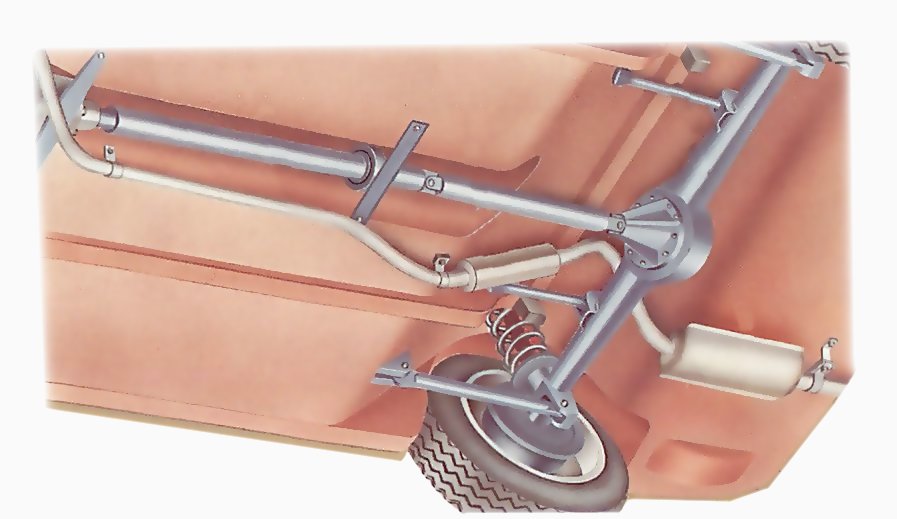
Parts of the exhaust system
A typical exhaust system with pipe, resonator box, silencer and tail pipe.
A damaged or worn exhaust system allows waste gases from the engine to escape before they have passed safely to the rear of the car.
The escaping gas makes a chuffing noise that gets gradually louder as the holes or cracks get larger.
Leaks must be sealed quickly. Exhaust fumes can be lethal, and if they seep into the car may cause drowsiness and perhaps an accident.
This video course is the best way to learn everything about cars.
Three hours of instruction available right now, and many more hours in production.
- 4K HD with full subtitles
- Complete disassembly of a sports car

It is also illegal to use a car on the road with a defective exhaust system.
Most exhaust systems consist of several parts held together by clamps or bolted flanges. A few cars have a one-piece system.
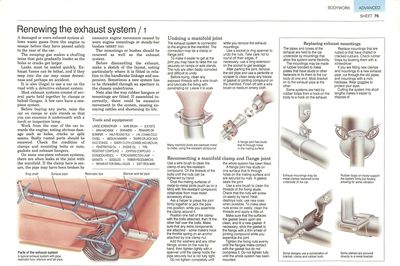
Before buying any parts, raise the car on ramps or axle stands so that you can examine it underneath with a torch or inspection lamp.
Work from the rear of the car towards the engine, noting obvious damage such as holes, cracks or split seams. Badly rusted parts should be renewed. Check the condition of clamps and mounting bolts or nuts, gaskets and exhaust hangers.
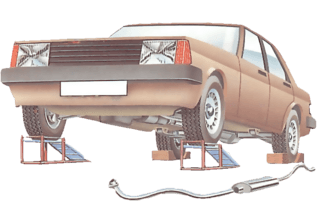
On some one-piece exhaust systems, there are often leaks at the joint with the manifold. If the clamp here is secure, the pipe may have been broken by excessive engine movement caused by worn engine mountings or steady-bar bushes (See Engine mount replacement).
The mountings or bushes should be renewed as well as the exhaust system.
Before dismantling the exhaust, make a sketch of the layout, noting particularly where it is fitted in relation to the handbrake linkage and suspension. Sometimes a new system has to be threaded through an aperture in the chassis underframe.
Note also the way rubber hangers or mountings are fitted. If assembled incorrectly, there could be excessive movement in the system, causing annoying rattles and shortening its life.
Undoing a manifold joint
Many manifold joints are clamped metal to metal, using fire-resistant compound.
The exhaust system is connected while you remove the exhaust to the engine at the manifold. The connection may be a clamp or flange joint.
To make it easier to get at the joint you may have to raise the car securely on ramps or axle stands. The nuts are often badly corroded and difficult to undo.
Before trying, clean any exposed threads with a wire brush and lubricate the fixing with penetrating oil. Leave it to soak while you remove the exhaust mountings.
Use a socket or ring spanner to undo the nuts. Take care not to round of their edges. If necessary, use a long extension on the socket to get leverage.
After parting the joint, remove the old pipe and use a penknife or scraper to clean away any traces of gasket or jointing compound on the manifold. Finish off with a wire brush or medium emery cloth.
Reconnecting a manifold clamp and flange joint
A flange joint has studs that fit through holes in the mating surface.
Use a wire brush to clean the clamp of any fire-resistant compound. Oil the threads of the bolts until the nuts can be tightened by hand.
Coat the mating surfaces of metal-to-metal joints (such as on a Mini) with fire-resistant compound, obtainable from most motor accessory shops.
Ask a helper to press the joint firmly together or jack the pipe into position, while you assemble the clamp around it.
Position one half of the clamp with the bolts attached, then fit the other half over the bolts. Make sure that any extra components are attached — some makers hook the throttle spring on an anchor attached by one clamp nut.
Add the washers and any other fittings, screw on the nuts by hand, then tighten lightly with a spanner until the clamp holds the pipe securely but is not fully tight.
Do not tighten completely until the whole system has been fitted.
A flange joint has studs on one surface that fit through holes on the mating surface and are secured by nuts. A gasket seals the joint.
Use a wire brush to clean the threads of the fixing studs. Check that the nuts will screw on easily by hand. Heat destroys nuts, use new ones when possible. To make steel nuts screw on easily, clean the threads and apply a little oil.
Make sure that the surfaces the gasket bears upon are clean, and fit a new gasket. If necessary, stick the gasket to the flange with a thin smear of jointing compound while you assemble the joint.
Tighten the fixing nuts evenly until the flanges make contact with the gasket but do not compress it. Do not tighten fully until the whole system has been mounted.
How to replace exhaust mountings
Exhaust mountings may be metal clamps fastened to the underside of the car.
Rubber loops on hooks support the system firmly but flexibly, allowing for some vibration.
Some designs use a combination of bracket, clamp and rubber bush.
Some clamps are secured directly to a metal bracket.
The pipes and boxes of the exhaust are held to the car underside by mountings that allow the system some flexibility.
The mountings may be made of rubber bonded to metal plates that have studs or other fasteners to fix them to the car body at one end. Most bracket onto the exhaust pipe at the other.
Some systems are held by rubber loops from a hook on the body to a hook on the exhaust.
Replace mountings that are rusted or that have chafed or cracked rubbers. Check rubber loops by levering them with a screwdriver.
If you are fitting new clamps and mountings to a new exhaust pipe, cut through the old pipes and mountings with a mini-hacksaw. Wear goggles to protect your eyes.
Cutting the system into short lengths makes it easier to dispose of.
