Vous pourriez avoir besoin de
A typical carburettor assembly has several attachments that must be taken off or disconnected before the carburettor can be removed. Start with the air cleaner, which will give better access to linkages and fuel pipe.
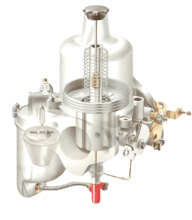
Over a period of time, dirt inevitably gets through the fuel filter of a carburettor, and chemicals in petrol leave residues which can eventually clog parts of it.
Moving parts wear — in particular needle valves. Jet needles become worn so that they no longer regulate the fuel flow smoothly. The idling jet of a fixed-jet carburettor, which is very small, can become blocked.
Rubber diaphragms used in some carburettors crack and perish. Gaskets and seals become leaky. The float height can alter, causing flooding.
This video course is the best way to learn everything about cars.
Three hours of instruction available right now, and many more hours in production.
- 4K HD with full subtitles
- Complete disassembly of a sports car

Strip, clean and check the carburettor occasionally, or at any time when you suspect trouble.
See if you can find a special kit of parts for servicing your carburettor.
The kit normally includes all gaskets, any washers or clips which should be replaced, a new float needle valve and sometimes new jets.
Often there is a basic service kit or a complete overhaul kit — try your local garage or accessory shop. Otherwise phone and ask the nearest carburettor specialists for the type on your car.
Be sure to get exactly the right kit. Jet and needle sizes vary from car to car — even for the same carburettor.
If you replace no other parts, always renew the gasket between the carburettor and the inlet manifold, and any split pins, clips or lock washers.
A service kit cannot, however, deal with wear around the throttle spindle. It is the light-alloy carburettor body which wears, not the spindle. Eventually air leaks in, upsetting the mixture. Test for wear by wiggling the spindle when the engine is idling. If the engine note changes, there is a leak. The only practical solution is an exchange carburettor.
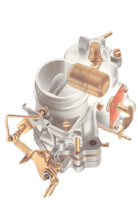
The carburettor is a delicate mechanism with settings that are disturbed by dismantling. It has many small parts which are easily lost or misplaced.
Have paper and pencil ready to record the number of turns it takes to remove any adjuster screw. This will save time when you re-tune the carburettor afterwards (See Preparing for carburettor adjustment).
Also make drawings of any complex linkage or special order of washers or seals which you might have trouble reassembling correctly. Mark anything with a sliding adjustment, so you can see exactly how it fitted originally.
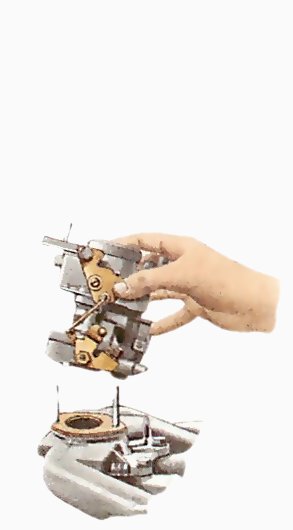
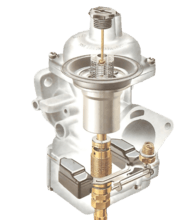
Lifting off the carburettor
Unscrew the nuts holding the carburettor to the inlet manifold studs. Lift it off, keeping it right way up as it contains fuel. Tip this away safely. Leave the gasket on the inlet manifold as a guide so that you can fit the new gasket the right way round. Keep the carburettor upright when lifting off.
Also mark any seemingly symmetrical parts (such as an SU dashpot) so that you do not replace them back to front — this can affect their working.
Some gaskets are nearly symmetrical, except for one or two holes. Be quite sure they are the right way round.
Some valves and pipe unions have balls or springs inside which can fall out or get lost. Dismantle the carburettor over a sheet of clean paper. When you unscrew a valve, tip the carburettor up and note if anything falls out, and where from.
Work in a clean place, and guard against dust and fluff getting into the carburettor. Even a tiny speck can cause trouble. Use petrol for cleaning. It will remove all the dirt that matters. Ignore discoloration.
Remove jets (if possible) to clean them. They are made of brass which is easily damaged: use a screwdriver which fits the slot exactly.
Do not poke them with a pin or wire. Blow through them with a foot pump if you have one.
