Vous pourriez avoir besoin de
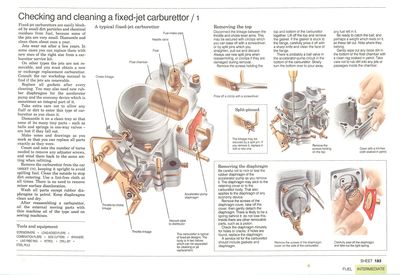
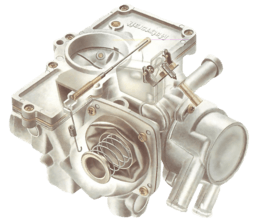
A typical fixed jet carburettor
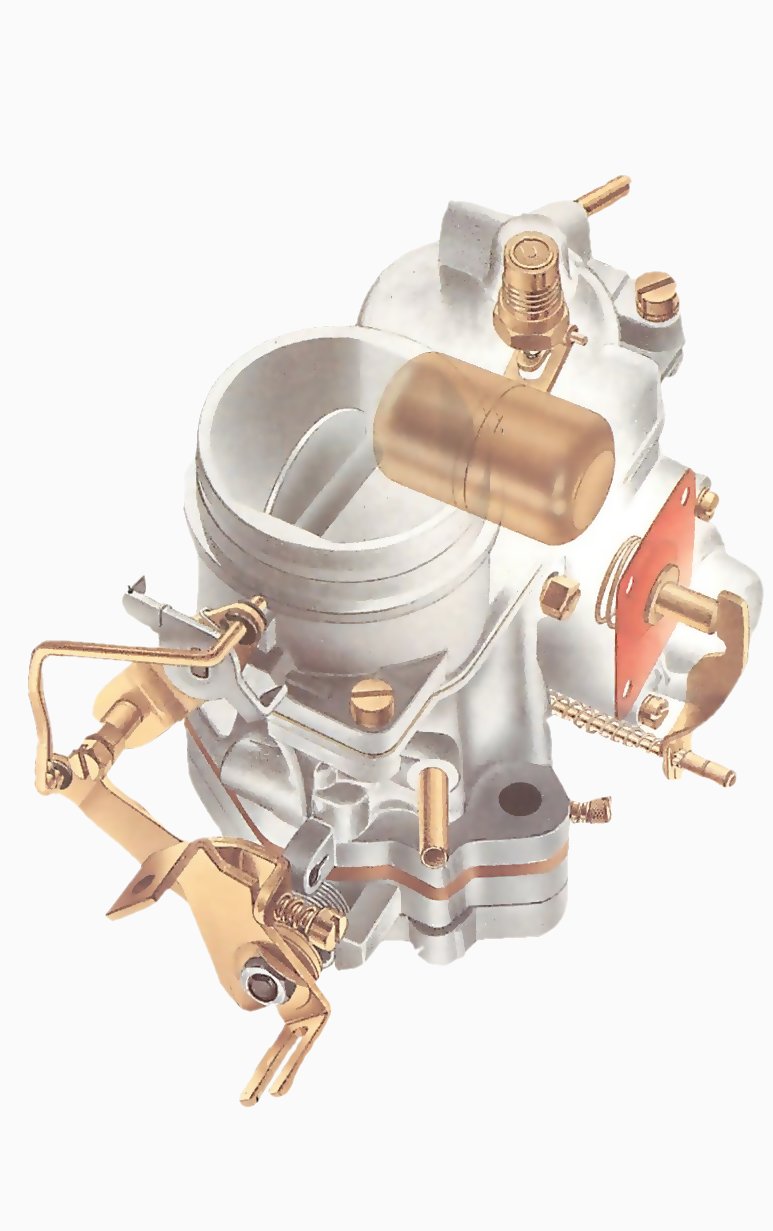
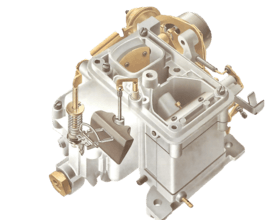
This carburettor is typical of fixed-jet designs. The body is in two halves which can be separated for cleaning or jet replacement.
Fixed-jet carburettors are easily blocked by small dirt particles and chemical residues from fuel, because some of the jets are very small. Dismantle and clean them about once a year.
Jets wear out after a few years. In some cases you can replace them with new ones of the right size from a carburettor service kit.
On other types the jets are not removable, and you must obtain a new or exchange replacement carburettor. Consult the car workshop manual to find if the jets are renewable.
This video course is the best way to learn everything about cars.
Three hours of instruction available right now, and many more hours in production.
- 4K HD with full subtitles
- Complete disassembly of a sports car

Replace all gaskets after every cleaning. You may also need new rubber diaphragms for the accelerator pump and the economy device which is sometimes an integral part of it.
Take extra care not to allow any fluff or dirt to enter this type of carburettor as you clean it.
Dismantle it on a clean tray so that none of its many tiny parts - such as balls and springs in one-way valves are lost if they fall out.
Make notes and drawings as you work so that you can replace all parts exactly as they were.
Count and note the number of turns needed to remove any adjuster screws, and wind them back to the same setting when refitting.
Remove the carburettor from the car (See Removing a carburettor for cleaning), keeping it upright to avoid spilling fuel. Clean the outside to stop dirt entering. Use a lint-free cloth at all times. There is no need to remove minor surface discoloration.
Wash all parts except rubber diaphragms in petrol. Keep diaphragms clean and dry.
After reassembling a carburettor, oil the external moving parts with thin machine oil of the type used on sewing machines.
Removing the top
Prise off a circlip with a screwdriver.
Disconnect the linkage between the throttle and choke lever arms. This may be secured with circlips which you can ease off with a screwdriver; or by split pins which you straighten, pull out and discard. Always use new split pins when reassembling, or circlips if they are damaged during removal.
Split-pinned
The linkage may be secured by a split pin . If you remove it, replace it with a new one.
Remove the screws holding the top and bottom of the carburettor together. Lift off the top and remove the gasket. If the gasket is stuck to the flange, carefully prise it off with a sharp knife and clean the face of the flange.
Remove the screws holding on the top.
There is probably a ball valve in the accelerator-pump circuit in the bottom of the carburettor. Slowly turn the bottom over to pour away any fuel left in it.
Clean with a lint-free cloth soaked in petrol.
Be ready to catch the ball, and perhaps a weight which rests on it, as these fall out. Note where they belong.
Gently wipe out any loose dirt in the bottom of the float chamber with a clean rag soaked in petrol. Take care not to rub dirt into any jets or passages inside the chamber.
Removing the diaphragm
Remove the screws of the diaphragm cover on the side of the carburettor.
Be careful not to nick or tear the rubber diaphragm of the accelerator pump as you remove it. The diaphragm may stick to the retaining cover or to the carburettor body. That also applies to the diaphragm of any economy device.
Carefully peel off the diaphragm and take out the light spring.
Remove the screws of the diaphragm cover, take off the cover, then gently detach the diaphragm. There is likely to be a spring behind it: do not lose this. Inside there are other removable parts, such as a piston.
Check the diaphragm minutely for holes or cracks. If holes are found, replace the diaphragm.
A service kit for the carburettor should include gaskets and diaphragm.
Removing the float and valve
Push out the pivot pin to free the float.
Remove the float to clean the needle valve which it controls. The float is delicate and easily damaged, so take care. Usually you simply push out the pivot pin and lift the float off.
Unscrew the needle valve, wash it and blow through it with a foot pump to clear it. If the needle or jet are worn, replace the whole valve. A worn valve may cause flooding - but there are two other possible causes.
Remove the needle valve for cleaning the valve and its seat.
One is a leak in the float, which makes it sink. Shake the float: any fuel in it means that it is leaking and should be renewed.
The other cause of flooding is an incorrect float level.
The pivot pin is held in two mounting posts, one of which is split. Free the pivot pin by inserting a very small screwdriver in the split and gently levering it open. Push the pin out as soon as it can be moved freely. The post is an alloy casting and is brittle, so take care as it will break easily.
Checking the float height and the needle-valve assembly
On some carburettors you can check the gap with the shank of a drill bit.
The correct height setting varies between carburettors, but the setting for your particular one should be given in a service manual for the car. Otherwise, consult your local dealer.
The setting is measured in different ways, according to the type of carburettor.
On most of those which have the float pivoted under the carburettor top, invert the top and insert the shank of a suitably sized drill bit between float and top.
On others, position the top so that the float depresses the needle valve, then measure the distance between the underface of the carburettor top and the bottom of the float - usually with the gasket fitted. This measurement should be made with a 150 mm steel rule.
Adjust the setting by bending the tag.
With certain carburettors - notably some Solex types - the measurement is to the marked centreline of the float, or its underside.
Adjust the height by bending the tag on the float arm, which rests against the needle valve. Usually there are two tags - the other one stops the float from falling too far, and its setting does not have to be exact.
Adjust with a washer
Sometimes you need to add a washer to the needle valve to adjust the float level.
Do not bend the float arm where it is attached to the float - in doing so you may damage the float and cause it to leak.
A leaking float should not be repaired, for the weight is critical. If you seal it by adding a blob of solder or epoxy resin glue, the weight of the float and the fuel intake is affected.
Keeping the jets clean.
Types of jet
Jets can vary in shape and size. A main jet has a larger hole than a secondary or idler jet, which does not need to pass as much fuel.
There are four types of jet, though a carburettor may have more than one of each - for example in a twin-choke carburettor.
Each of the carburettor jet caters for a different part of the engines speed range. You can to some extent diagnose a fault in a particular jet by bad performance at the engine speed it governs.
The main jet is the largest. It supplies fuel at full throttle openings and high engine speeds. It is usually set either in the bottom of the float chamber or in an extension of the carburettor top which reaches down into the chamber.
The idle jet supplies a tiny trickle of fuel for idling. It is very narrow and easily blocked.
Between idling speed and high speed, progression jets supply more fuel as needed. The progression system also includes an emulsion tube - a mixing device that is longer than the jet and has holes in the walls.
The accelerator pump also has a pump jet. Trouble in this jet causes hesitant acceleration - but this may equally be due to another fault in the pump, such as a holed diaphragm.
Usually jets and emulsion tubes are removable and have a screw slot in its head. They are made of soft brass and easily damaged, so use a screwdriver that fits the slot exactly.
If the jet does not have a screw slot, it is not removable. Clean it in place, using a foot pump to blow air though it.
Never blow through a assembled carburettor - if you do you may rupture the diaphragms, cause the float to collapse or do other damage.
Weber carburettor have an air-correction jet fitted into the emulsion tube, and a main jet set in a jet holder which is inside the body of the carburettor.
Clean jets removed from a carburettor by washing them in petrol, and use a foot pump to blow them clear, but do not poke them with wire. Do not even use a soft brush: it might leave a bristle inside which would block the jet.
If you have recurring problems with the jets blocking, check the filter gauze at the carburettor fuel intake, if fitted.
There may be a hole in the gauze, which is letting dirt through.
If the carburettor does not have a filter, consider fitting a separate in-line fuel filter if one is not fitted already.
