Vous pourriez avoir besoin de
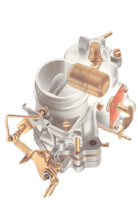
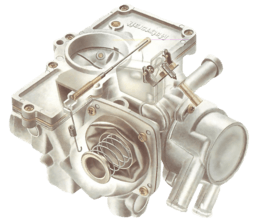
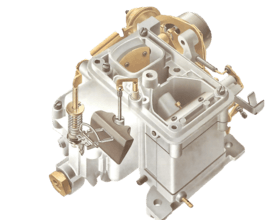
Stromberg carburettor
The Stromberg carburettor does not have a regular service schedule, but should be cleaned about once a year. Replace worn parts as necessary.
Dirt which has penetrated the fuel filter, and residues from chemicals in petrol build up inside. Needles and jets wear out after a few years' use.
The rubber diaphragm may become holed - and even a tiny hole causes loss of engine power. As the hole enlarges, the engine will eventually do no more than idle.
This video course is the best way to learn everything about cars.
Three hours of instruction available right now, and many more hours in production.
- 4K HD with full subtitles
- Complete disassembly of a sports car

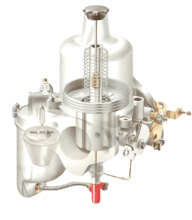
Remove the carburettor from the car to clean it. Keep it upright to avoid spilling petrol, then empty it safely. Clean all parts except the diaphragm by rinsing in a dish of petrol.
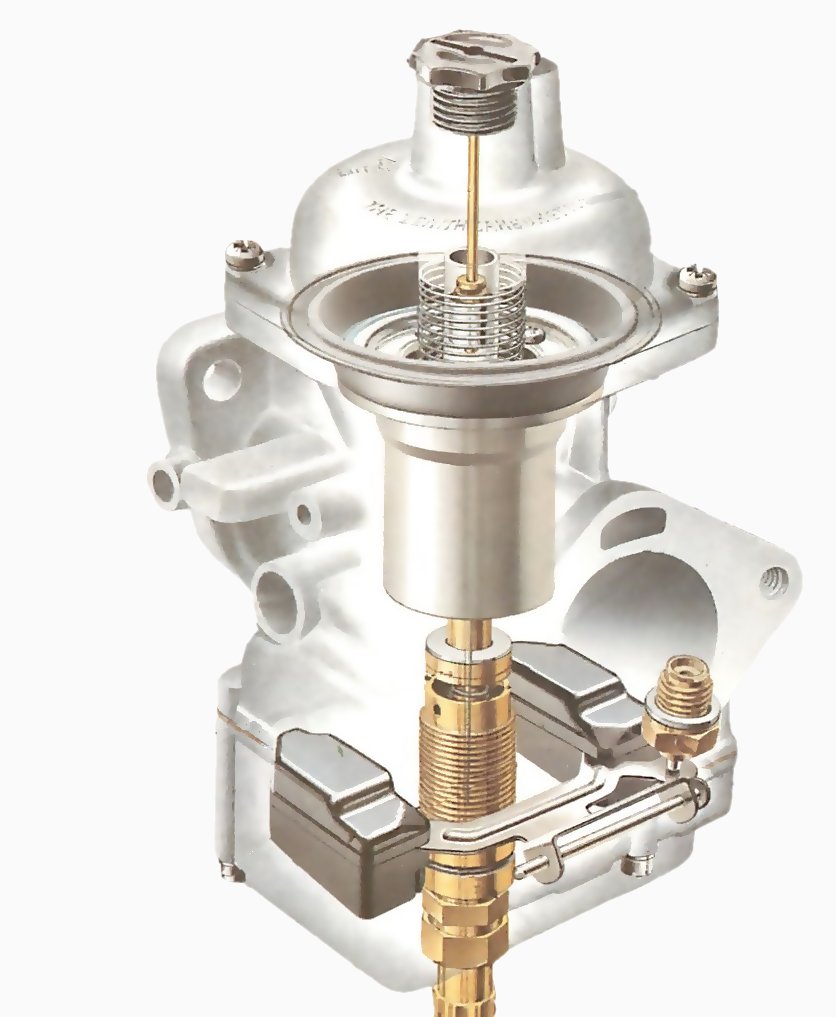
Removing the dashpot and piston
Remove the four screws holding the dashpot top.
Unscrew the damper from the top of the piston chamber - commonly called the dashpot. Pour the oil inside it away.
Mark the dashpot top so that you can refit it to the chamber the same way round.
Remove the screws and lift off the top carefully, making sure that the piston spring does not catch and so drag out the piston.
Lift off the top, taking care the spring does not catch.
Check that the diaphragm, which will come out when you remove the piston, is not stuck down around its edge: it is easily torn.
Lift out the piston, pulling it straight up so as not to bend the needle in its base. Note that on the diaphragm edge there is a tab that fits into a slot in its seating on the chamber base.
Do not bend the jet needle; note the tab on the diaphragm edge.
After reassembly, refill the dashpot with multigrade engine oil to just above the level of the brass piston inside the tube - or you can obtain a special SAE 20 oil made by the carburettor manufacturers.
Replacing the jet needle and diaphragm
Loosen the grub screw to free the needle.
A badly worn jet needle has a groove round it, but less severe wear is invisible.
Wear does, however, affect performance, so replace the needle every few years.
There are many needle sizes: be sure to get exactly the right one. Remove the needle by loosening the grub screw in the side of the piston.
To remove the diaphragm carefully undo the screws of its retaining ring.
Lift off the retaining ring and diaphragm. Hold the diaphragm up to the light and check it minutely for the tiniest hole.
The diaphragm is held on by a ring and four screws; do not nick the rubber with the screwdriver as you remove them.
if it has become perished, hard or misshapen, renew it.
Be sure to fit the new diaphragm the right way round and the right way up. There is a tab on its inner edge that fits into a recess in the piston.
Take care not to get oil or petrol on the diaphragm, and not to nick or tear it.
Loosen the grub screw to free the needle.
Pull the diaphragm gently and hold it up to the light to show any pinholes.
The diaphragm is held on by a ring and four screws; do not nick the rubber with the screwdriver as you remove them.
Pull the diaphragm gently and hold it up to the light to show any pinholes.
Dismantling the float chamber
Pull the adjuster stop straight off.
Before removing the float chamber, pull the adjuster stop off the jet with pliers. Note that emission-control models (See Adjusting an emission-control carburettor) do not have such a stop.
Take out the six screws securing the float chamber. You should then be able to lift the chamber off — but the sealing ring around the jet may make it stick.
Pull carefully: a sharp jerk or twist might damage the float.
With the chamber removed, pull out the float pin to free the float.
Remove the six float chamber securing screws.
Lift off the float chamber without twisting or levering.
One type of pin usually pulls straight out.
Levering it off
This type has to be levered off with a screwdriver - take care not to scratch the carburettor body.
Older models have a pin that you can usually remove with your fingers. If it is stiff, gently prise it out sideways with a thin screwdriver. Emission-control models have a pin set in clips: lever it out carefully with a screwdriver.
The float needle valve is screwed into the base of the float chamber. It is in one piece and cannot be dismantled for cleaning. If it is worn it must be replaced.
If the float needle valve is blocked you may have to replace it.
Adjusting the float
With the carburettor inverted, measure the height of the float above the body edge.
A float is maladjusted, or is leaking so that it no longer floats properly, causes persistent flooding of the carburettor.
Shake it - if fuel splashes inside, it is leaking and must be replaced.
If adjustment fails to cure the flooding, that too calls for a new float and a new needle valve.
Bend the tag to adjust the float height.
With the carburettor upside-down, measure the height of the bottom of the float (now at the top) above the edge of the body.
The height should be 16 to 18mm long for a hollow float or 18.5 to 19.5 mm for a solid float.
Adjusting the valve
Fitting a thinner or thicker washer under the valve will alter its height and that of the float.
Adjust the float by bending the tag that touches tho needle valve, or by fitting a thicker or thinner washer under the valve.
With the carburettor inverted, measure the height of the float above the body edge.
Bend the tag to adjust the float height.
Removing the jet
Loosen the jet holder by turning the lower hexagon
Do not remove the jet of an emission-control model (See Adjusting an emission-control carburettor): a special adjusting tool is needed for its castellated adjuster nut. Do not even turn it: this alters the mixture. Clean it in place by washing with clean petrol; blow it clear with a foot pump.
Remove a conventional jet by unscrewing the holder, using a spanner on the lower of the two hexagonal parts. Do not move the jet-adjusting screw, as this will alter the mixture (See Adjusting a Stromberg carburettor).
With the holder removed, pull out the jet.
Lift off the jet holder and pull out the jet. Wash the jet in clean petrol and blow through it with a foot pump to clear it.
Check the rubber '0' ring round the jet holder for signs of wear or cracking. A failed ring will allow petrol to leak from the float chamber.
Lever off the ring with a pin or thin screwdriver; take care not to scratch the surface. Roll the new ring on over the holder.
After reassembling the carburettor, centralise the jet (See Adjusting a Stromberg carburettor) if necessary.
