Vous pourriez avoir besoin de
Suction fan kit
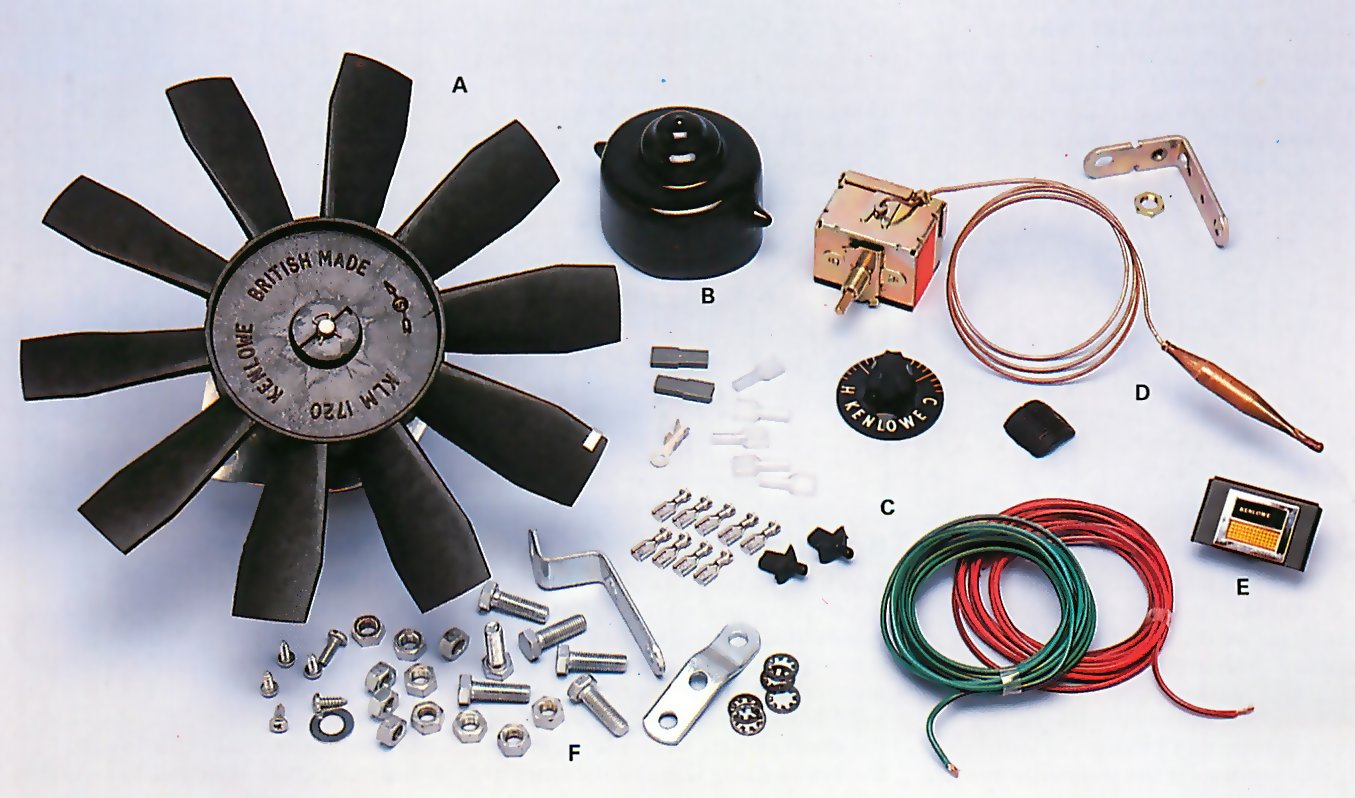
This suction fan is supplied in kit form with all the necessary parts for fitting it. The kit includes the fan and motor (A), with protective cover (B), wiring and electrical connectors (C), and temperature sensor and setting control (D). A dash-mounted warning light (E) and all the necessary nuts, bolts and washers (F) are also included.
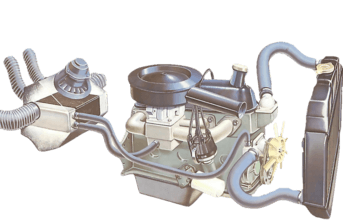
Fitting an electric, thermostatically controlled fan in place of the mechanical, engine-driven type can save you fuel and allow you to regain engine power normally wasted in constantly driving the fan.
This article shows you how to fit an electric fan to a car that has a transverse engine with a side-mounted radiator - such as the Mini.
Restricted space
This video course is the best way to learn everything about cars.
Three hours of instruction available right now, and many more hours in production.
- 4K HD with full subtitles
- Complete disassembly of a sports car

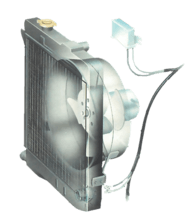
The compactness of the engine compartment in this type of car means that there is a restricted amount of space around the radiator area and you need to fit a special type of electric fan - a suction fan.
Also as a result of restricted space, the fan is mounted in a different way. Instead of being attached to the radiator itself, it is fitted to the inner wing, outboard of the radiator. Hence it sucks. rather than blows air through the radiator. You need to cut a hole in the cowling that covered the mechanical fan to allow air, which is forced into the engine bay when the car is travelling, to help cool the radiator so that the fan doesn't have to work all the time the engine is running.
Fitting
It is a little more complicated to fit a fan to a side-mounted radiator than to a front-mounted one. You need to do some cutting and drilling to the inner wing and you also have to remove the radiator to cut out the hole in the cowling.
Fitting the temperature sensor and control unit and wiring up the system is much the same as for the other types of fan.
The procedure for fitting a Kenlowe suction fan to a BL Mini is covered overleaf. When fitting this fan, or another maker's fan, to another model of car, you should refer to the kit fitting instructions for any additional or alternative instructions.
1. Remove fan
Drain the cooling system. Release all the radiator securing bolts and lift it out of the engine bay. Remove the drive belt, fan bolts and fan, then refit the water pump pulley and fan bolts. You may have to pack out the pulley bolts with washers to make up for loss of fan thickness. Refit the belt.
2. Mark and cut wing
Rest the car on an axle stand and remove the road wheel. Find the midpoint between the upper and lower centre vent slot in the inner wing. Scribe a line 15/8in (41mm) above and below and on each side of this point to form a square. Cut out the square with a hacksaw. This lets the motor pass through the wing.
3. Rotation test
Join a wire to each fan motor terminal and touch the loose ends to the battery terminals. The motor should spin anti-clockwise viewed from the spindle side. Swap the wires on the motor if it spins the other way. Fit the shrouds over the terminals and the rubber cover over the rear of the fan motor.
4. Fit the motor
Attach the specially shaped brackets to the motor. Offer the assembly up to the wing,a nd mark and drill four 8mm holes in the wing. Secure the motor and bracket to the wing making sure the nuts and bolts are tight. Fit the fan to the motor spindle with the side marked 'S' nearest to the radiator.
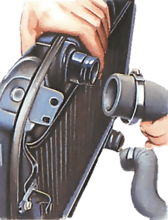
5. Radiator shroud
Mark out the section to be removed on the radiator shroud. The side to cut out is the one nearest to the front of the car. The entire side of the cowling should be cut out using a hacksaw but leave the flanges that attach to the radiator (see diagram). Refit the radiator back into position.
6. Fitting sensor
Refit the radiator bottom hose. Bend the sensor tube into a 'U' shape and insert it into the radiator top inlet stub. Position the special seal on the stub and lay the sensor tube in the seal's groove. Position the hose and Jubilee clip over the seal and sensor tube and tighten the clip. Fill with coolant.
7. Thermal control
Fit the thermal control to its bracket making sure the sensor tube emerges next to the bracket. You should then mount the bracket on the bodywork as near to the sensor as possible. Make sure the coiled sensor tube can't rub on any other components. Fit the over-ride switch to the dash.
8. Wiring up
Run the red/black motor wire to an ignition-controlled feed. Run the green/black motor wire to the NO thermal control terminal and then another wire from there to the dash switch 4B terminal. Run a live feed to the dash switch 3A terminal. Earth the control box C and indicator light 5B terminal.
9. Testing
Turn the control knob fully clockwise. Run the engine until the temperature gauge is halfway between normal and hot. Turn the control anti-clockwise until the fan starts. The fan should switch off before the needle returns to the normal position. Lock the switch in position with the screw provided.
