Vous pourriez avoir besoin de
Service points
Most of the servicing on a diesel engine is similar to that on a petrol engine.
Fitting a new oil filter and changing the engine oil is exactly the same, as is setting the valve clearances.
Replacing the air filter can differ from a petrol engine depending on the design of filter fitted.
The main difference lies in servicing the fuel system, particularly the fuel filter.
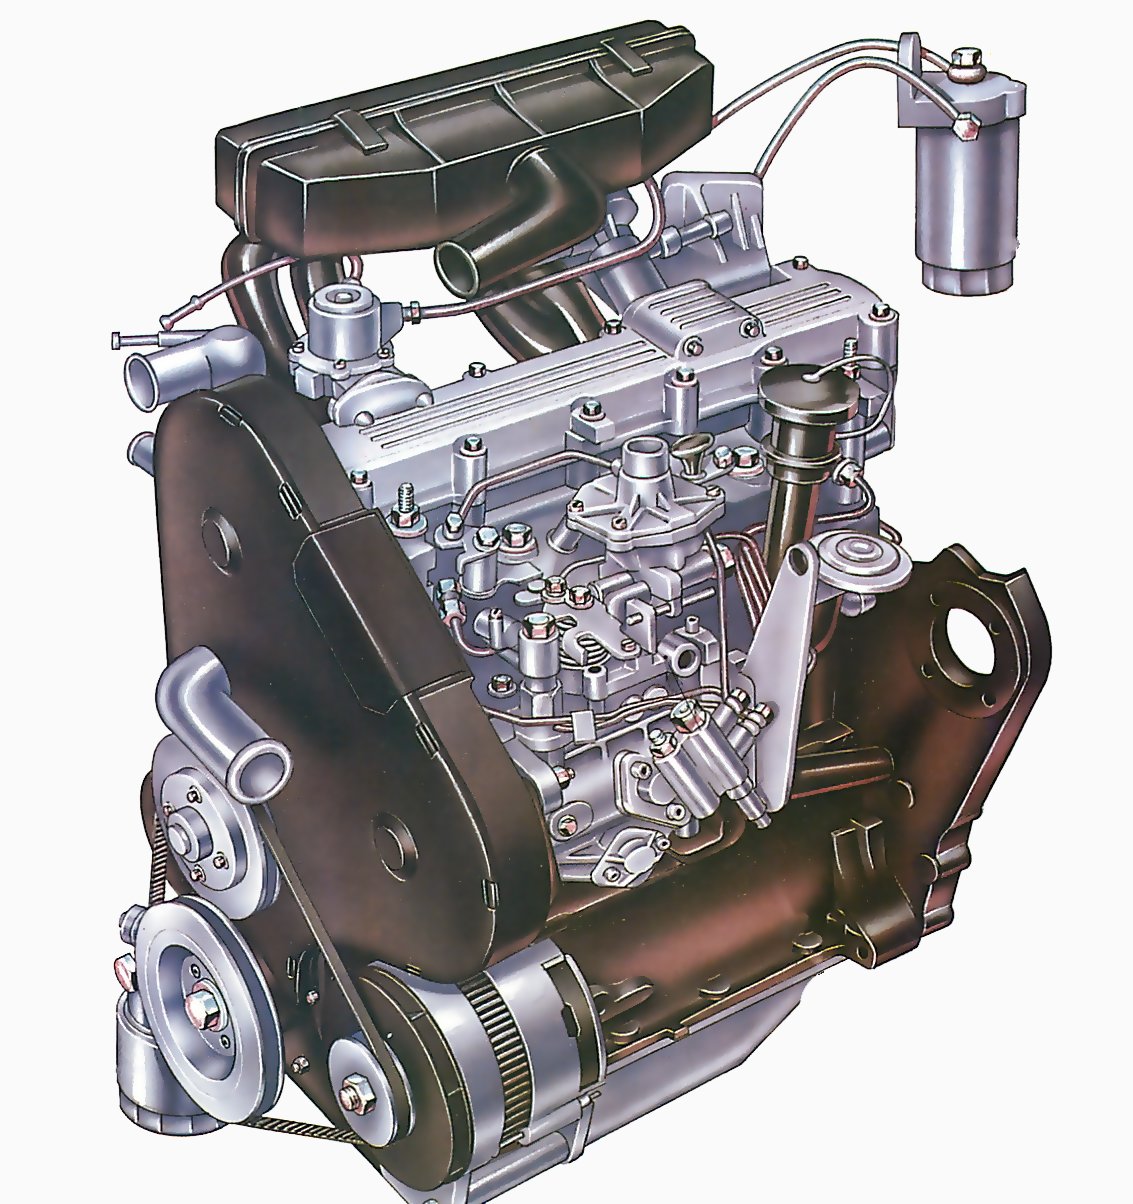
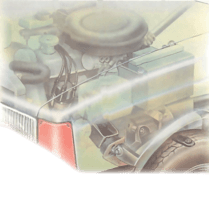
In many ways a diesel engine is less complicated than a petrol engine, with greater reliability and a longer working life. There is little difference between servicing a diesel and a petrol engine except that the diesel has no ignition system to worry about. However, the fuel system needs very careful attention, as part of the regular service, to prevent dirt and water in the fuel damaging it.
Filter/water trap
The very small working clearances in diesel engine injector pumps and injectors means it is vital that the fuel passing through the system is always clean.
This video course is the best way to learn everything about cars.
Three hours of instruction available right now, and many more hours in production.
- 4K HD with full subtitles
- Complete disassembly of a sports car

There is always at least one filter fitted in the fuel supply line, usually in the engine bay. It may be mounted on the bodywork, or sometimes on a bracket attached to the cylinder head. The filter element is disposable and should be replaced at the recommended service intervals or sooner.
The fuel filter also traps any water in the fuel and you should drain it at regular service intervals, or sooner if the engine is suffering from misfiring.
Draining water
The fuel filter is usually fitted with a drain tap or plug to drain off the water. First, open the vent valve on the top of the filter housing to allow the water to drain easily. You will find it usually has a screwdriver slot in the head.
If you can't find a vent valve, there may not be one fitted, in which case you can create a vent by carefully undoing the uppermost fuel pipe union that is connected to the filter casing. Hold an old jar under the drain plug or tap, then open the plug or tap and let the fuel flow out.
Watch the fluid that emerges to see how much water is in it. Close the drain tap or plug only when the flow has changed to pure diesel fuel. Retighten the vent valve (or reconnect the fuel pipe). If the engine still runs badly, the next job is to renew the fuel filter.
Draining the filter
Release the vent valve positioned at the top of the filter housing.
If there isn't a valve, loosen the uppermost fuel pipe union from the filter housing.
Hold a jar under the drain plug or tap, and loosen the plug or tap.
Let the filter drain until clean diesel fuel flows out, then close the plug or tap and then the vent valve.
To drain water from the filter, release the vent yalve positioned at the top of the filter housing. If there isn't a valve, loosen the uppermost fuel pipe union from the filter housing.
Hold a jar under the drain plug or tap, and loosen the plug or tap. Let the filter drain until clean diesel fuel flows out, then close the plug or tap and then the vent valve.
Servicing a canister filter
Take off the filter and discard it.
Undo the vent plug or pipe union in the top of the filter casing and drain the filter. Spin off the filter and throw it away. If the filter is very tight, use a strap wrench to remove it.
Smear a little clean diesel fuel on the filter sealing ring then fit the filter to the housing and screw it on hand-tight. Make sure the drain plug or tap is closed.
Fuel filter
With all types of filter, start by cleaning off all traces of dirt from around the filter casing and housing - absolute cleanliness is essential when working on the fuel system. Then drain off all the water and fuel from inside the filter in the way described above.
Some cars have a canister filter much the same as an oil filter. The filter element is replaced complete with its casing.
A second filter design has a semi-canister filter that is held between two endplates. Find the securing nut or screw that holds the two plates together (usually in the centre of the top endplate). Hold the bottom endplate and the filter element, undo the nut or screw and lower the endplate and element away, together with the 0-rings that seal the joins to the endplates.
Fit new 0-rings to the filter element, then reassemble it to the endplates - do up the securing nut or screw tightly to prevent leaks.
A third design of filter has a replaceable filter element contained in a housing, much like the older design of oil filter. Find the bolt or screw that secures the filter bowl to the filter mounting. Hold the bowl, and undo the fixing. Remove the bowl, making a note of how any sealing washers fit.
Pull the old filter element from the bowl. Wipe out any dirt in the bowl, then fit the new element. Fit a new sealing 0-ring into the filter mounting, and replace the bowl, doing up the fixing bolt or screw tightly to hold it firmly.
Replaceable element
Where the filter sits inside a metal bowl, you first have to get the bowl off. Drain off the fuel, then find the bolt or screw that holds the bowl to the filter. Hold on to the bowl and release the fixing. Release the bowl, then lift out the element from inside it.
Clean out the bowl with a non-fluffy rag then fit the new element and reassemble the bowl. Don't forget to shut the drain tap.
Replacing a semi-canister filter
Undo the nut holding the filter together.
If the filter consists of a metal cased element sandwiched between two metal endplates, you only need to renew the element.
Drain off the fuel via the drain plug or tap, then undo the nut or screw holding the assembly together. Release the bottom endplate and filter element.
When refitting, fit new sealing 0-rings to seal the joins between the filter element and the endplates.
Bleed fuel system
Fitting a new fuel filter allows air to get into the fuel system, which will prevent the engine from running properly - the same thing can also happen if you run out of fuel. Most engines have an automatic bleed system which gets rid of the trapped air but others have to be bled manually. However, it is often a good idea to bleed the system manually, even if it is supposed to be self-bleeding.
Some systems have a hand-operated bleed pump built into the injector pump, but otherwise you have to turn the engine over on the starter to make the main fuel pump operate.
Undo the vent valve on the fuel filter housing. If there is no plug, slacken off the top pipe union on the housing. Operate the hand bleed pump or turn the engine over on the starter (a helper may be useful) and watch the vent plug or union. You will see a mixture of fuel and air bubbles coming out.
Continue pumping until the emerging diesel fuel is free of bubbles, then close the vent valve (or tighten the pipe union). Sometimes there is another valve on the injector pump that you have to bleed in the same way - ask your dealer if your car has one.
Oil and air
Renewing the oil filter is identical to that on a petrol engine. But when filling with new oil, make sure you use the correct grade for your car. Many diesels use a different grade of engine oil to petrol engines - check in your handbook to see the exact specification required.
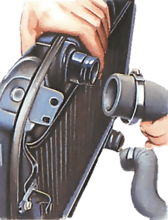
Fitting an air filter is usually the same as on a petrol engine although some newer diesels use large air filters, housed in a two-piece plastic casing held together by spring clips.
Carefully remove the old filter, then wipe out the filter casing using a damp rag. Take care not to let dirt drop into the engine's air intake. Fit the new filter into the casing, then reassemble the casing halves and snap over all the spring clips, making sure they engage properly.
