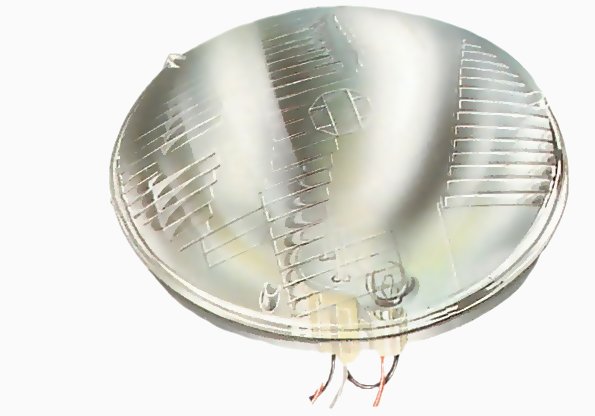
A sealed unit is hermetically sealed and evacuated; it is, in effect, a large light bulb, and must be replaced complete.
Sealed-beam headlamps are simple to change, but the way of gaining access to them varies from car to car.
To remove a traditional round bezel (outer rim), undo the single self-tapping screw at the bottom, pull the bottom of the bezel forward and lift it off two lugs at the top.
On some cars you need to remove the front grille, which may be held by self-tapping screws or clips.
This video course is the best way to learn everything about cars.
Three hours of instruction available right now, and many more hours in production.
- 4K HD with full subtitles
- Complete disassembly of a sports car

Sealed-beam unit and other round headlamps
With the bezel removed, take out the screws of the sealing ring.
The sealed unit is clamped into its metal 'bucket' by a retaining ring, which may be fixed by three small screws. Make sure you do not undo the nearby adjuster screws (See Aligning the headlamps) by mistake.
Remove the ring, after which the headlamp can be lifted clear.
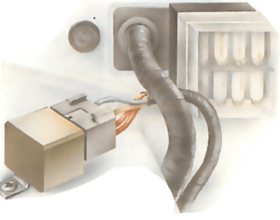
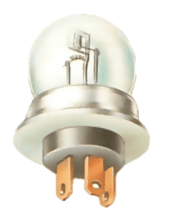
Remove the ring and pull the sealed unit forward, revealing the three-pin connector on the back.
Pull off the connector to free the unit.
Remove the lamp and disconnect it.
On some lamps the retaining ring is not screwed on, in which case only the adjuster screws at the top and side are visible. Push the lamp assembly inwards against spring pressure, then turn it anti-clockwise to line up holes with the adjuster screws and free the ring.
When you fit the replacement unit, be sure to fit it right way up, which is clear from the lettering on the front.
In a non-sealed unit, remove the rubber cover and retaining clip.
Round headlamps with bulbs are generally attached in the same way as sealed units; but here, when renewing the lens and reflector, remove the bulb, which is held by a retaining clip, not just the connector.
A sidelamp may be fitted into the back of the reflector. Turn it anticlockwise and pull it out, together with its rubber seal.
A small sidelamp may be fitted, using the back of the unit's reflector. REmove it by turning anti-clockwise.
On cars with levers for adjusting the beam to allow for heavy loads, make sure you leave the lever in the right position. In any case, set the beam as shown in Aligning the headlamps or have it set at a garage.
Rectangular headlamps
Remove the screw holding on the top adjuster, and prise it away from its bracket.
Fixings vary from car to car, but in general they are simpler than those of round lamps and can be reached from under the bonnet.
Typically, the whole assembly is held in place by a single screw - the one which holds the upper adjuster to the front panel. Remove the screw and lever the adjuster away from its bracket with a screwdriver.
Try not to alter the adjuster setting. Pull the lamp forward and up off its bottom lugs.
Pull the three-pin connector off the bulb, then remove the rubber sealing cover and the bulb holder (twist both anti-clockwise). Take out the sidelamp; it is a bayonet fitting (twist anti-clockwise) and comes off in one piece with its cover.
Lift out and disconnect the lamp unit.
Unclip the two adjusters and the lower fitting guide from the old lamp unit and fit them to the new one, then put in the bulbs, refit the connections and lower the unit into place. Engage the lugs at the bottom with the slots, then push the lamp home and refit the single screw.
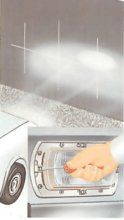
When fitting a quartz halogen bulb, do not touch the glass part with your bare hands - this could cause it to fail prematurely in use.
On cars with levers for adjusting the beam to allow for heavy loads, make sure you return the lever to the right position. In any case, set the beam as shown in Aligning the headlamps.
Small lamps
Undo the screws holding the lens to change the bulbs.
The plastic lenses of small lamps often get broken, particularly on some cars with lamps in exposed positions. Replace a broken lens quickly; otherwise water will get in and soon you will have to replace the whole lamp. Corrosion is the main reason for failure of lamps.
On most lamps, lenses are fixed by small screws on the outside, and you replace bulbs from outside too. On others the bulbs are replaced from the back, for example inside the boot. Here you may have to remove the whole lamp to free the lens. Usually this involves undoing several nuts or screws and pulling the lamp free, after which its lens lifts off.
The lamp backplate is held on by nuts inside the bodywork.
The metal backplate of a lamp with a front-fitted lens usually has studs fitting through holes in the car body, held by nuts or spring clips reached from behind. They are likely to be corroded, and you may need to use penetrating oil.
Make sure connections are clean and free from corrosion.
When refitting a lamp of any type make sure that the lamp itself, its mounting point and connections are clean and not corroded. Earthing is usually through the fixing screws, either via the lamp or by a separate earth lead, and if there is dirt or corrosion anywhere the lamp may not work.
Take care to fit rubber sealing gaskets properly. When replacing a combined stop/start bulb, take care to refit the connectors to the correct terminals.
