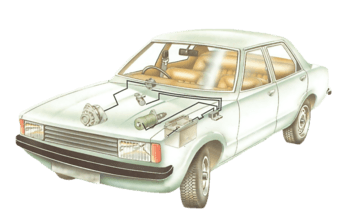
Modern cars have a large amount of electrical equipment which can go wrong and so need checking.
Which tester?
The range of meters on the market varies from simple dwell meters and tachometers to multi-function meters with up to ten different scales and even digital readouts. The meters shown above feature: A Sparktune: dwell, volts, ohms. B Autoranger: dwell, volts, ohms, amps, tachometer. C Testune: dwell, volts, ohms, amps, tachometer. D Hawk: dwell, tachometer. E Avometer 2003: volts, amps, ohms. F CAB-100: battery tester.
One way of checking the electrical circuits is to use a simple test lamp connected between the circuit live wires and earth, but this method only indicates if there is an electrical supply to the particular point you are checking.
A more accurate way of checking circuits is to use a test meter which will indicate the level of voltage reaching the component and also check the resistance of the circuit or component.
This video course is the best way to learn everything about cars.
Three hours of instruction available right now, and many more hours in production.
- 4K HD with full subtitles
- Complete disassembly of a sports car

Multi-meters
You can buy meters designed especially for car applications at accessory shops. The most useful type are those known as multi-meters which, as the name suggests, provide a number of different functions for checking car electrics.
The current used on cars is direct current (DC) and multi-meters can check current, voltage and resistance readings. They may also include other settings for measuring engine speed and dwell angle.
Always remember to zero the meter before each test, particularly when measuring low resistances.
Do not use a moving needle test meter for checking electronic components or you could overload and damage them. Instead, use a digital meter.
Using a multimeter
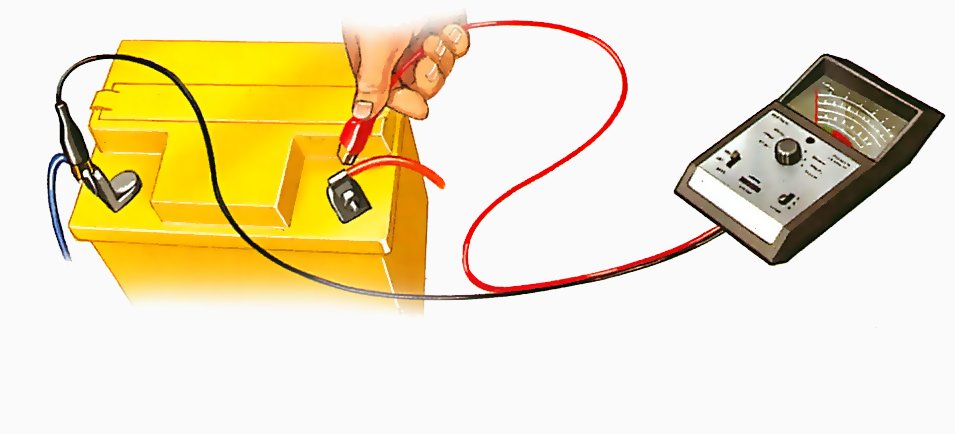
Set the meter to volts to check the battery voltage across the terminals.
Measure the resistance along an HT lead by setting the meter to ohms and probing each end of the lead.
You can use a multi-meter for checking voltage, current and resistance. Some also allow you to check the dwell angle and engine speed. Always remember to connect the meter probe correctly.
Check battery voltages by connecting the meter to the two terminal posts. Test resistance in the HT circuit by probing both ends of the lead.
Set the meter to amps and connect it across a shunt to measure the current output from a generator.
Measure voltages by setting the meter to volts and probing the circuit with the other probe earthed.
Record alternator or dynamo current output using a meter connected across a shunt wire. Test voltage to the coil or any other circuit by connecting one side of the meter to the circuit and the other side to earth.
Taking a reading
Measure voltages by setting the meter to volts and probing the circuit with the other probe earthed.
When using a multi-meter the first thing is to make sure that you connect the meter leads the right way round. This depends on the polarity of your car. If your car uses a negative earth system you should attach the lead marked negative or (-) to the body. If your car uses a positive earth, the lead marked positive or (+) is connected to the car body. Check in your car handbook for the polarity of your car.
Make sure that the appropriate lead makes good contact and that there is no rust or paint in the contact area to upset the meter readings. Clean the connection if necessary with wet-or-dry paper.
When working in the engine bay it is best to connect the lead to the battery earth terminal.
Battery check
Before checking other circuits it is a good idea to make a check on the battery itself to make sure it is performing properly.
Set the meter to the appropriate scale (0-20 volts), then connect the meter leads across the battery terminals (not the lead connections). You should get a reading of between 11 volts (low charge) and slightly over 12 volts (full charge), depending on the battery's state of charge.
If the reading is less than 10 volts, suspect a fault in one of the battery cells. Move the earth lead to a point on the car body and take the voltage reading again. It should be the same as the first reading. A lower reading means there is a poor contact between the earth lead and the car body or battery terminal.
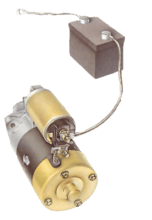
Repeat the process, this time connecting one meter lead to the earth terminal and the other to the live lead connection at the starter solenoid. A low reading here indicates a poor connection between the live battery terminal and the starter motor solenoid.
If any low readings are found on the battery leads, correct them now before checking other circuits on the car. Clean up any suspected dirty or loose connections and test the voltages again. When the tests all give the same reading as that across the battery you can then use the reading as a reference for readings made on the other circuits.
Instrument tests
Checking a rev counter
To test a rev counter, connect the multi-meter between the live terminal on the back of the instrument and an earth point. If there is a feed reaching the instrument, its voltage will be recorded on the meter. You can use the same technique for any gauge or instrument.
Many instruments are supplied with power that passes through a voltage stabilizer. If several instruments are showing erratic readings it could be due to a fault in the stabilizer. To check the voltage stabilizer, connect the meter to the stabilizer output terminal and switch on the ignition.
In modern cars many of the instruments are fed power through a voltage stabilizer. If this is faulty all the instrument readings will become erratic. Before testing individual instruments check the stabilizer is not at fault by connecting the meter between its output terminal and earth.
The meter should read around 10 volts although it might pulsate slightly because of the regulator. Any lower or higher means the stabilizer needs replacing.
Sender unit check
Checking the tank sender unit
Disconnect the wire from the sender terminal then connect the test meter between the vacant terminal and an earth point. You should get a range of readings, depending upon the position of the sender unit float. If no reading is shown, the sender unit needs to be removed for replacement or repair.
The petrol tank sender unit uses a variable resistor, which you can check for continuity by using the resistance scale on the multi-meter.
Disconnect the wire to the sender unit and connect the meter between its terminal and a suitable earth point. If the sender unit circuit is complete, there should be a definite reading on the meter. To make a complete check make individual readings with the tank full, half full and empty.
The three readings should fall in progression with more or less equal gaps between them. If two of the readings are very close together it is likely that some of the resistor tracks have shorted out, giving false readings on the gauge.
Ignition tests
When checking the low-tension circuit remember the contact breaker points have to be closed to complete the circuit.
If the coil uses a ballast resistor the voltage at the input terminal will be lower (usually around 6 to 8 volts) due to the action of the resistor. To check the coil starting voltage, connect a lead between the coil points terminal and earth. Operate the starter briefly to bypass the ballast resistor. The value should be around 12 volts. Remove the lead.
If the value did not rise to this level there is a fault in the low-tension circuit or the solenoid terminal connections.
You can check the points by measuring any voltage drop across them. Connect the meter between the points terminals on the coil and earth.
With the contacts closed, turn the meter to read on the low volt scale. The reading should ideally be in the zero to 0.5 volts range. Any more than 0.5 volts indicates the points are faulty.
Turn the meter to the high volt scale and open the points. The voltage should be the same as that on the input side of the coil.
A zero reading may be because of a fault with the distributor and you can check this by disconnecting the distributor lead. If the reading is still zero there is a fault in the coil, but if it rises there is a fault with the distributor.
High-tension leads
You can use the resistance setting of the meter to check for problems with high-tension leads. If the car has an intermittent misfire, you may be able to trace it to one of the leads.
Find out which type of lead is fitted. Carbon leads have a resistance in the 10,000-25,000 ohm range. Copper-cored leads have a very low resistance but may be fitted with resistive plug caps for radio suppression and these have a resistance of around 10,000 ohms.
Disconnect each lead from the spark plug and distributor cap and hold the meter lead probes to the central core at each end. Make sure the meter reads correctly.
To check the HT lead insulation hold one probe to the central core of the lead and the other to the insulating plastic. If the lead is in good condition there should be no movement on the meter scale.
Current readings
Measuring the current output from a dynamo or alternator is more difficult with a multi-meter because the current levels produced by the generator are too great to be directly handled by most meters.
To use the meter to check the current output you have to fit what is known as a shunt to the circuit. This is a length of wire with a specific resistance. The meter is connected across the shunt wire and senses a voltage drop across it which gives a measure of the current flow. The shunt may be available with the meter. If not, you can find out from your manual the type you need.


