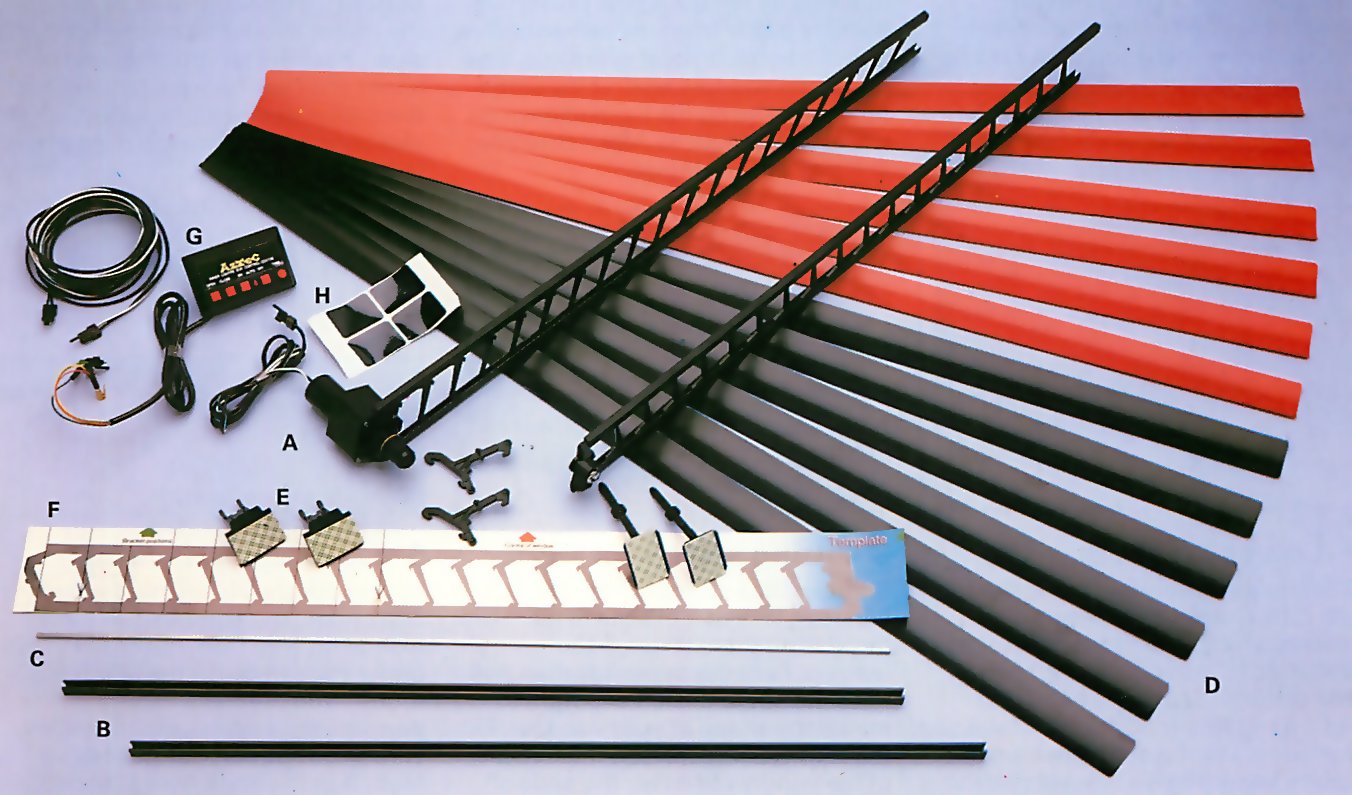
A window blinds kit
As well as improving the look of your car, rear windscreen blinds have a number of practical benefits. First they make your car more secure because they hide any valuables on the rear shelf (including radio-cassette speakers) from a casual car thief passing by.
They also help to keep your car interior cool on a hot summer's day by blocking off the sunlight pouring through the rear screen, and they reduce dazzle in your rear view mirror, whether it be from the headlights of the car behind you or from bright sunlight.
Types of blind
This video course is the best way to learn everything about cars.
Three hours of instruction available right now, and many more hours in production.
- 4K HD with full subtitles
- Complete disassembly of a sports car

You have a choice of two types of blind - roll-up and louvred, the louvred types being basically similar to a household Venetian blind.
Roll-up blinds are often easier to fit, but they do have one disadvantage - they have to be either up or down. With louvred blinds, however, you can vary the amount of light coming through the rear screen by tilting the slats.
Always remember, however, that you should never drive with the slats angled in such a way that they impair your rear-view vision.
A further advantage of louvred blinds is that some of them are electrically operated by a dashboard-mounted control, which allows you to adjust the slats from the driver's seat. Some Models even open and close the blinds automatically when you switch the ignition on and off. This article covers fitting louvred blinds only.
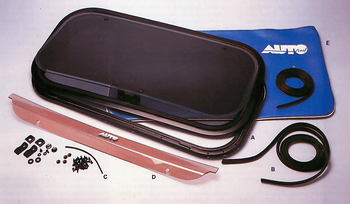
Features
Louvred blinds fit on the inside of the rear screen and are available in a range of colours so that you can match or contrast them with the colour of your car interior. They can be fitted to most models, including hatchbacks.
As well as the electrically operated louvred blinds, you can also buy manually operated ones. The procedure for fitting the blind itself is the same, whether it is an electrically or manually operated one.
1. Marking out
Use a tape measure to find the centre of the rear screen at the top and bottom. Mark these positions on the outside with a felt-tip pen. Offer up to the centre line the template provided in the kit. Mark the fitting positions for the mounting brackets on each side of the screen, top and bottom.
2. Ladder length
Place the template on the inside of the screen (this time on its edge). Trim the bottom off the template until it clears the parcel shelf. This gives you the required length of the support ladders. Offer up the template to the ladders and their aluminium extrusions and mark the template length on them.
3. Cutting ladders
Use a small hacksaw carefully to cut the ladders and their aluminium extrusions at the marked positions. When cutting the extrusions make sure the dimple formed in them remains on the measured section. Remove the top slat clip from the cut-off section and transfer it to the ladder top clip position.
4. Fit extrusions
Fit the two aluminium extrusions to the ladder inner rails —the ones next to the window. Make sure the dimples formed in the end of each extrusion are at the top of the ladder rail. Push each extrusion over the inner rail until the dimple grips the rail and holds it securely.
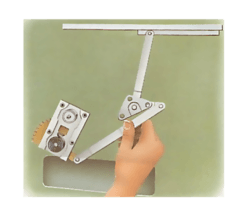
5. Top window brackets
Clean the window and make sure it is dry. Fit the upper ladder support brackets by removing the protective backing paper from the self-adhesive pad. Slide the bracket extension lugs under the window seal, at the same time as pressing the bracket base on to the window glass. Make sure you achieve a firm contact.
6. Assemble blind
Lay the two ladder assemblies on a flat surface with the extrusions at the bottom. (If fitting an electric blind, the motor should be on the left-hand side.) Pass the tilt rod through the lower slat clips on each ladder and the motor gearbox (if applicable). Fit two blind slats to the top clips of the ladder.
7. Lower brackets
Offer up the assembly, fixing the top slat clips to the upper window brackets. Fit the serrated pins to the ladder drive arms, referring to the instructions for the left-hand and right-hand fitting positions. Move the ladders to the open position and secure the adhesive bracket pads to the glass.
8. Fitting slats
Remove the assembly from the window. Fit a pair of slats to each clip by passing them through the ladders. Refit the assembly then pull the slats out to the left and right to match the shape of your window. Fit the four black stickers to the outside of the window to cover the pads of the mounting brackets.
9. Electric blind wiring
Mount the control unit to the dash. Disconnect the battery. Run the extension wire from the control unit under the carpets to the rear blind motor. Run the red wire to a permanent live feed and the yellow wire to an ignition-controlled live feed. Run the black wire to earth. Reconnect the battery and test.


