Vous pourriez avoir besoin de
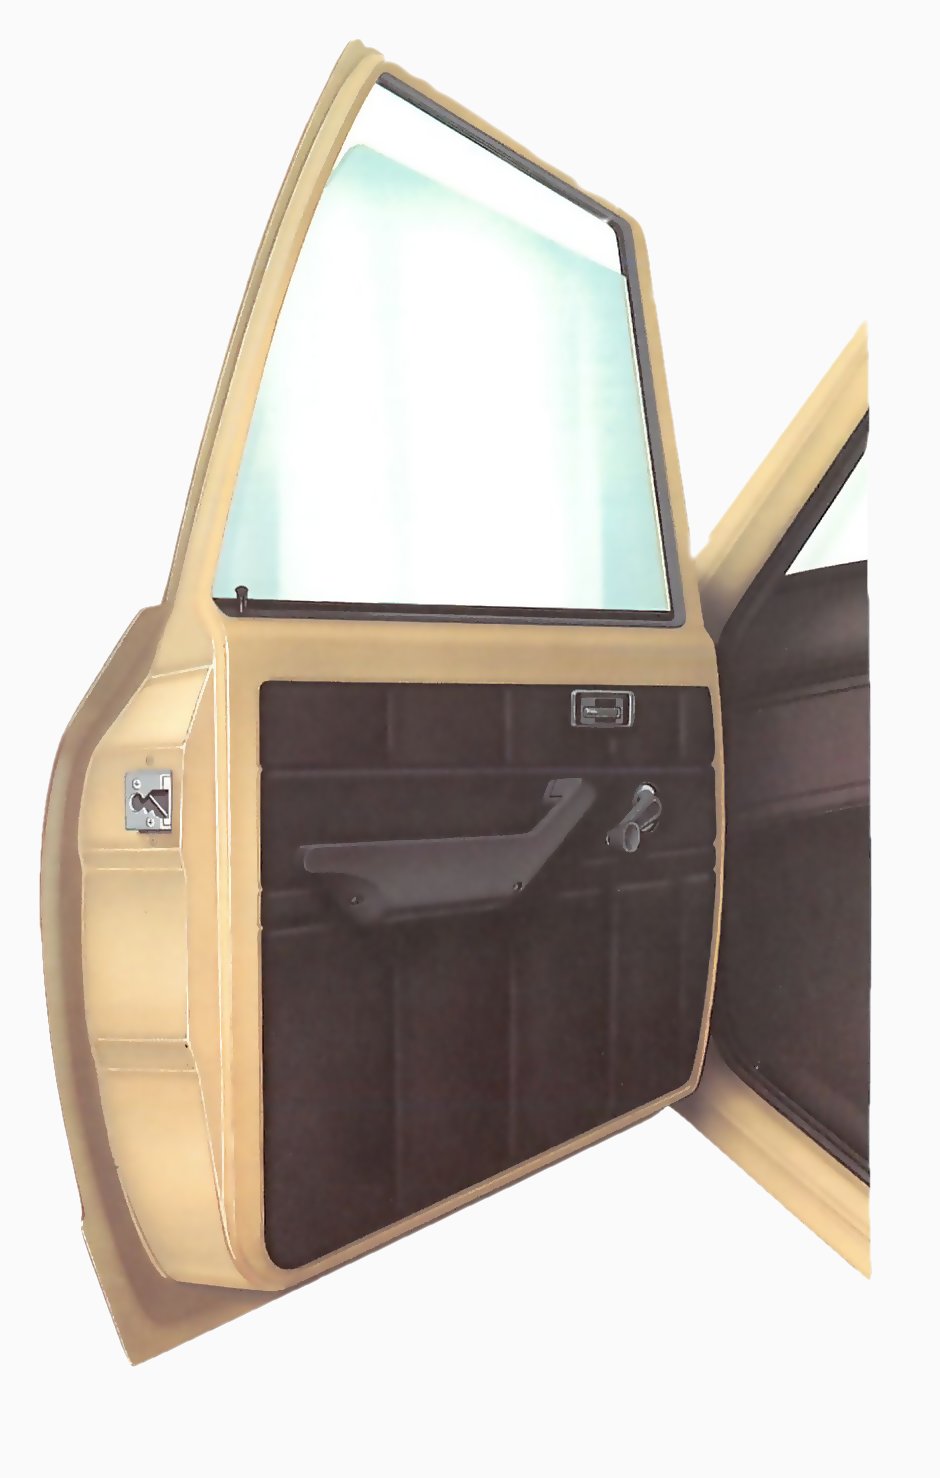
A typical interior door-panel layout, showing the fittings attached on most cars. Take care when removing the panel; it is flimsy and can easily be damaged.
Before a door-trim panel can be removed, the window winder and interior handle must be taken off, an probably also the push-button lock am an arm rest, if fitted.
A variety of fixing methods are use for the fittings, including screws clips, press studs and lugs.
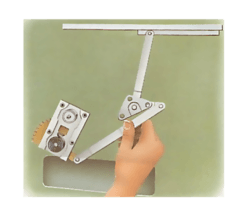
Removing a window winder
This video course is the best way to learn everything about cars.
Three hours of instruction available right now, and many more hours in production.
- 4K HD with full subtitles
- Complete disassembly of a sports car

Removing a window winder
There are three common ways of securing window winders. The simplest is with a central screw, often concealed by trim.
If there is no screw, press the panel towards the door and look behind the winder to its spindle.
Turn the winder and watch for either a fixing pin or a bent metal clip holding it to the spindle.
With the panel still pressed back, remove the pin or slide back the clip. Force out a pin with a slim implement such as a knitting needle.
To unfasten a metal clip, use a screwdriver to ease it from its slot, or hook it back with a bent split pin.
Removing a door handle and a push-button lock
Sliding out a door-handle surround.
Recessed interior door handles are often held by countersunk screws. Remove the screws, swing the assembly away from the door and unclip it from the control rod.
If there are no screws, the handle is normally held in place by the outer plastic surround. This is sometimes pressed into the trim and can be prised out with a screwdriver.
Alternatively, it may be a slide-on fit over lugs, removed by sliding and levering with a screwdriver.
If levering fails to shift the surround, consult your local main dealer or a service manual to find out how it is fitted.
If a push-button lock has to be removed, you can usually unscrew it from its control rod.
Removing arm-rests and luggage bins
Most arm rests are held in position by large self-tapping screws that tighten into nylon fasteners fixed in the door frame.
Look underneath the arm-rests for the screw heads. They are often concealed under a flap of plastic trim. If there are no screws, the armrest probably comes away with the panel.
Luggage bins are usually fixed in the same way as arm-rests.
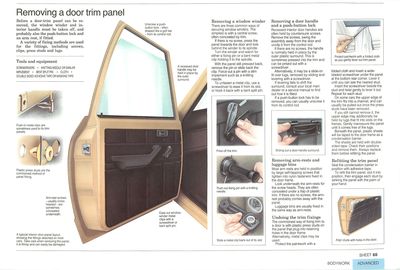
Undoing the trim fixings
Push-in metal clips are sometimes used to fix trim panels.
The commonest way of fixing trim to a door is with plastic press studs on the panel that plug into retaining holes in the door frame. Alternatively, metal clips may be used.
Plastic press studs are the commonest method of panel fixing.
Protect the paintwork with a folded cloth and insert a wide-bladed screwdriver under the panel at the bottom rear comer. Lever it until you can see the nearest stud.
Insert the screwdriver beside the stud and twist gently to lever it out. Repeat for each stud.
Protect paintwork with a folded cloth as you gently lever out trim panel.
On some cars the upper edge of the trim fits into a channel, and can usually be pulled out once the press studs have been removed.
If you still cannot remove it, the upper edge may additionally be held by lugs that fit into slots on the frames. Gently manoeuvre the panel until it comes free of the lugs.
Beneath the panel, plastic sheets will be taped to the door frame as a condensation barrier.
The sheets are held with double-sided tape. Check their positions and remove them. Always replace them before refitting the panel.
Refitting the trim panel
Align studs with holes in the door.
Seal the condensation barrier in position with adhesive tape.
To refit the trim panel, slot it into position, then engage each stud by striking the panel with the palm of your hand.
